# RedwoodJS - Create a full stack application in minutes
Isn't it annoying re-inventing the wheel? Imagine this, you get a new idea for a startup or even just a basic project you'd like to do for yourself because you can. Here's what you're gonna start thinking about...
- I've gotta write some boring boilerplate code for the client
- I've gotta write some boring boilerplate code for the server/api
- I've gotta do *GASP* auth... again.
- I've gotta think about a deployment strategy.
- *Insert another annoying situation here that makes you rethink your career because you're so damn tired writing the same code over and over again for each project*
I think I've made my point. Let's not reinvent the wheel and not repeat ourselves *cough...* DRY principle *cough...*
**RedwoodJS** solves most, if not all of these issues!
I hear you my fellow brethren & sistren with that out of the way, if you want to have a better quality of life as a developer please continue to read on and let's get coding!

### Step 1: Create a Redwood project
Let us start by creating a Redwood project from scratch to see how easy the process is. Reference to the [quick start docs here](https://redwoodjs.com/docs/quick-start)
```bash
### Instantiate a new JS project
yarn create redwood-app my-redwood-project # OR
### Instantiate a new TS project
yarn create redwood-app my-redwood-project --typescript
cd my-redwood-project
yarn rw dev
```
Bingo! you've got an API server w/Graphql, a front-end client, and a database ORM (Prisma)
Amazingly, with those 3 commands executed in the terminal here's what we've already done.
[x] Created a boilerplate for the client with ReactJS
[x] Created a graphql server with prisma as our ORM
Hey, if you ask me that's a pretty good deal ain't it!
If you visit the following ports on `localhost` you'll see all the magic that happened
`localhost:8911` - API server
`localhost:8911/graphql` - Graphql playground
`localhost:8910` - ReactJS front-end
### Step 2: Generate a database model for Prisma
Lets try generating a model for Posts. Go into `api/db/schema.prisma` and add the following model:
```bash
# api/db/schema.prisma
model Post {
id Int @id @default(autoincrement())
title String
body String
createdAt DateTime @default(now())
}
```
Then try running:
```bash
yarn rw prisma migrate dev # Runs the prisma migrations
yarn rw g sdl post # Creates sdl definitions
```
This will create the prisma migrations for you, you will be prompted for a name for the migration, in this case you may name the migration as `Create post` or something like that.
_Note: If you're facing problems here concerning types, this usually can get resolved by running:_
```bash
yarn rw g types # Generates the necessary types. Usually fixes type errors
```
### Step 3: Check our model and add in some data
I prefer using Prisma studio to check our model since no components or pages get added to the `web` folder. All you have to do is run:
```
yarn rw prisma studio
```
If you then proceed to `localhost:5555` you should be greeted by Prisma studio

Feel free creating, modifying, and/or deleting records here by clicking on `Post.` You will be greeted by this screen to perform CRUD operations within Prisma studio:
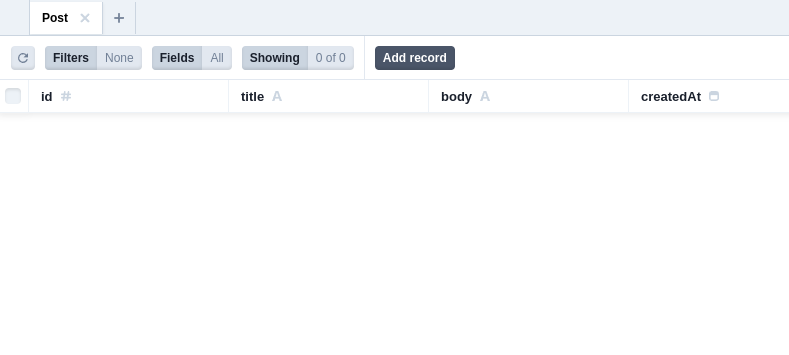
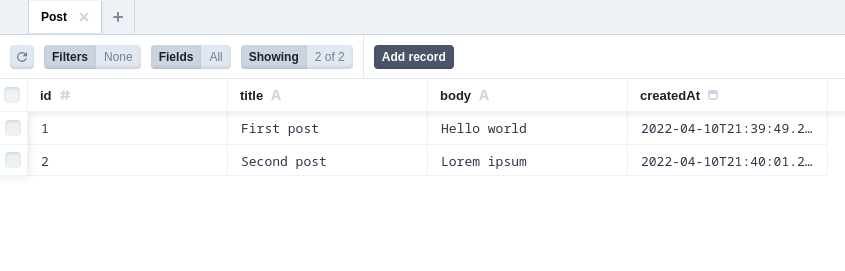
Try clicking the `Add record` button to add some data to our database (currently it's in sqlite but RedwoodJS has integrations with many databases including MySQL & Postgres.)
### Step 4: Create pages in the web folder
Let's shift our focus to the front-end. To generate a new page in RedwoodJS, all you have to do is run this command
```
yarn rw g page home /
```
This will do the following:
- Create a page located at `web/src/pages/HomePage/`
- Create a test file located at `web/src/pages/HomePage/`
- Create a a storybook file located at `web/src/pages/HomePage/`
- Update the `routes` file
If you visit `web/src/Routes.tsx` you'll see it's been auto-magically updated for you
```typescript
// web/src/Routes.tsx
import { Router, Route } from '@redwoodjs/router'
const Routes = () => {
return (
)
}
export default Routes
```
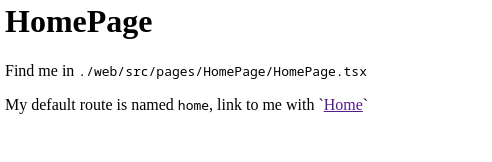
and now if you visit `http://localhost:8910/` you'll see a really good looking home page.
### Step 5: Tying things together
Ok, to recap so we've:
- Created a database model
- Added some data into our sqlite database
- Created a default Home page in our web application
Now, how do we fetch data from our back-end? RedwoodJS has this concept of `cells` (no, not the ones you learned in biology.)
In a nutshell, `Cells` serve 1 purpose and that is to display the correct components depending on the state of the data being fetched. Let's try creating a cell by running this command:
```bash
# Note: make sure it's plural `posts`
yarn rw g cell posts
```
After running the command, you'll see another auto-magically generated component in `web/src/components/PostsCell`
```typescript
// web/src/components/PostsCell/PostsCell.tsx
export const QUERY = gql`
query PostsQuery {
posts {
id
body // Add this to see the body of your post
title // Add this to see the title of your post
}
}
`
export const Loading = () => Loading...
export const Empty = () => Empty
export const Failure = ({ error }: CellFailureProps) => (
Error: {error.message}
)
export const Success = ({ posts }: CellSuccessProps) => {
return (
// Make this look good on your own time
// I ain't getting paid for this
{posts.map((item) => {
return - {JSON.stringify(item)}
})}
)
}
```
As you can see the component renders depending on the current state of the data being fetched (Empty, Failure, Success,Loading) say goodbye to manually updating asynchronous data in your web app.
Now, this is just a component. It hasn't been used yet, to use it, you may want to import it in your `home page` for now:
```typescript
import { MetaTags } from '@redwoodjs/web'
import PostsCell from 'src/components/PostsCell' // IMPORTANT
const HomePage = () => {
return (
<>
)
}
export default HomePage
```
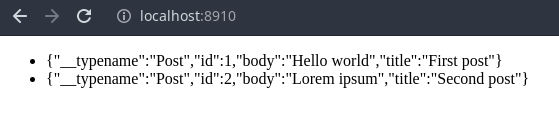
You should get an output like this:
**Bingo banggo bonggo! You just made a full-stack application in minutes 🎉🎉🎉**
## What about authentication and deployment?

I know, I know... It ain't here but that's only because we've only scratched the surface. If we could get a fullstack web app in minutes, do you really think the deployment pipeline & setting up authentication will take longer? (Spoilers: It doesn't!)
If you want to proceed with setting up auth you may want to run this command so redwoordJS can help you set it up:
```bash
# RedwoodJS has adapters for many Auth providers too!
yarn rw setup auth --help
```
For deployments:
```bash
# RedwoodJS also has many adapters for deployment providers
yarn rw setup deploy --help
```
## Conclusion
If you haven't noticed by now, RedwoodJS takes care of all the heavy lifting when it comes to setting up a project. We only have to run a few generator commands **Laravel flashbacks inbound...** and we only have to write code that matters...
We're called developers for a reason, let's develop new stuff